Photography Tips for Capturing Palm Springs Stargazing
Understanding the Best Time for Stargazing in Palm Springs
Palm Springs offers incredible stargazing opportunities, but timing is everything. The best time to catch the night sky is typically between late spring and early fall when the weather is clear and the skies are dark. Aim for nights with minimal moonlight, as a bright moon can wash out faint stars and constellations.
The night sky is a canvas, and the stars are the paint that makes it come alive.
Additionally, try to plan your stargazing around astronomical events like meteor showers or specific celestial alignments. These moments can add an extra layer of excitement and beauty to your photographs. Websites and apps that track celestial events can help you stay informed.
Finally, don’t forget to check the local weather forecast. Even in sunny Palm Springs, unexpected clouds can roll in and obscure your view. A little planning can go a long way in ensuring you capture the best of the night sky.
Choosing the Right Location for Optimal Views
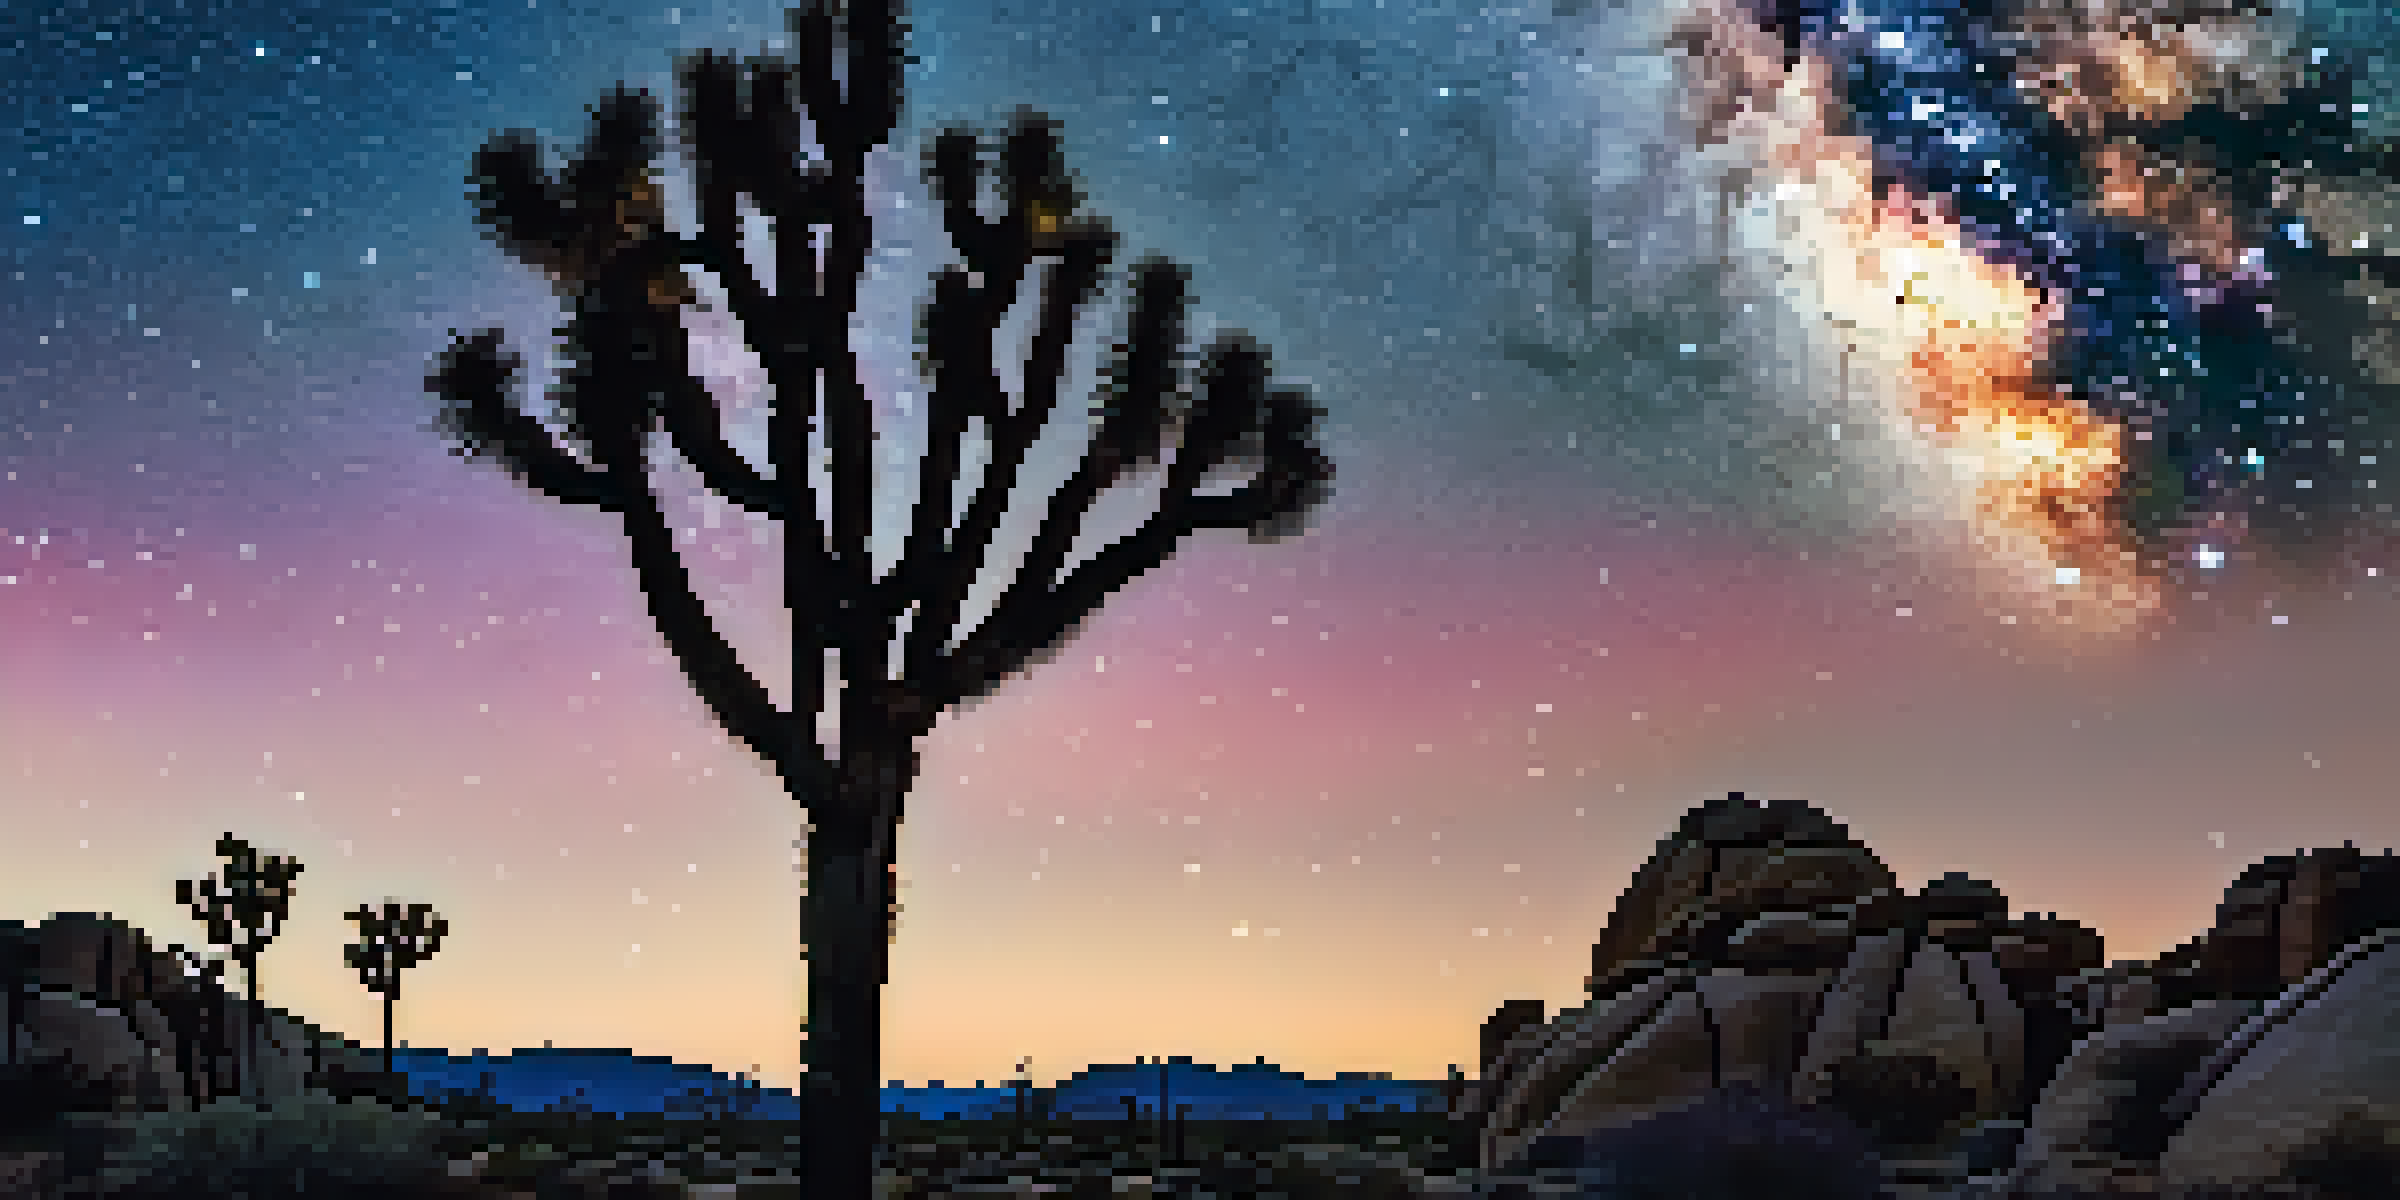
Finding the perfect spot is crucial for capturing stunning stargazing photos. Look for areas away from city lights, as light pollution can dim the stars. Places like Joshua Tree National Park or the San Jacinto Mountains are excellent options to consider.

When selecting a location, consider the landscape as well. A foreground element, such as a rock formation or desert plant, can add depth and interest to your photos. Think of your composition and how the stars will frame against these elements.
Optimal Timing for Stargazing
The best stargazing in Palm Springs occurs from late spring to early fall on nights with minimal moonlight.
Lastly, ensure that your chosen location is safe and accessible, especially after dark. Familiarizing yourself with the area during daylight can help you navigate better when the stars come out.
Essential Gear for Nighttime Photography
To capture the beauty of the night sky, having the right gear is essential. A DSLR or mirrorless camera will give you the flexibility you need for various settings. Pair it with a sturdy tripod to keep your camera steady during long exposure shots, which are crucial for stargazing photography.
In every walk with nature, one receives far more than he seeks.
You might also want to invest in a wide-angle lens, as it allows you to capture more of the sky while ensuring sharpness across the image. A lens with a low f-stop (like f/2.8 or lower) is ideal for letting in more light, producing brighter images of stars and constellations.
Don’t forget to bring extra batteries and memory cards. Cold temperatures at night can drain batteries faster, and you wouldn't want to miss that perfect shot because you ran out of space or power.
Camera Settings for Stunning Night Sky Photos
Understanding your camera settings is vital for photographing the night sky. Start with a low ISO setting (around 800 to 1600) to capture the stars without too much noise. The goal is to find a balance between sensitivity and clarity, so experimenting is key.
Next, use a wide aperture (like f/2.8 or wider) to allow more light into your camera. This setting helps to create that beautiful starry effect. A longer exposure time, anywhere from 15 to 30 seconds, will also capture more light and detail in the stars.
Choosing the Right Location
Select dark areas away from city lights, like Joshua Tree National Park, for the best stargazing views.
Lastly, consider using manual focus. Autofocus can struggle in low light, so switching to manual will let you focus precisely on a bright star or distant object. This simple adjustment can significantly improve the sharpness of your images.
Incorporating Foreground Elements for Depth
Including foreground elements in your stargazing photos can take your compositions to the next level. Objects like cacti, rocks, or even silhouettes of people can add context and interest to your images. This technique can create a sense of scale and connection to the landscape.
When positioning your foreground subject, think about the rule of thirds. This composition principle suggests placing your subject off-center to create a more balanced and engaging photo. For instance, placing a cactus in the left third of your frame while the stars fill the rest can lead to a striking image.
Experiment with different angles and perspectives. Sometimes, lying on the ground or shooting from a higher vantage point can yield dramatically different results, making your stargazing photos unique and captivating.
Post-Processing Tips for Night Sky Photography
Once you've captured your stunning stargazing photos, post-processing can enhance their beauty even further. Software like Adobe Lightroom or Photoshop can help adjust exposure, contrast, and color balance, bringing out the night sky's richness.
Start by correcting the exposure and highlights to ensure the stars stand out. You can also slightly increase the clarity to enhance the details of the stars and foreground elements. Be careful not to overdo it, as this can introduce noise and detract from the image's natural beauty.
Essential Gear for Night Photography
A DSLR or mirrorless camera, sturdy tripod, and wide-angle lens are crucial for capturing stunning night sky images.
Finally, consider adding a bit of saturation to make the colors pop. This adjustment can help your photos feel more vibrant and alive, capturing the awe of the stargazing experience you had in Palm Springs.
Sharing Your Stargazing Photos with the World
After capturing those breathtaking night sky photos, it's time to share your work! Consider using social media platforms like Instagram or photography communities to showcase your shots. Engaging with other photographers can provide valuable feedback and inspire new ideas.
When sharing your photos, don't forget to use relevant hashtags to reach a broader audience. Tags like #Stargazing, #NightPhotography, or #PalmSprings can help connect you with fellow enthusiasts who appreciate your craft.

Lastly, consider creating a blog or website to showcase your photography journey. This platform allows you to tell the story behind your images, share tips, and connect with others who share your passion for capturing the beauty of the night sky.